Week 1
1,133 words · 6 min read
Summary
January 12 - January 18
Meetings
- 01/13 9am-10am Tuesday, Instructional Team Meeting
- 01/16 1:30pm-2:30pm Friday, Instructional Team Meeting
- 01/16 2:30-3:00pm Friday, 1-on-1 with Prof. Adams
Accomplishments
- Developed and deployed senior project website, https://cs351.couetil.com
- Met instructional staff and graduate teaching assistants
- Wrote analysis of how the past course session used Gradescope’s Autograder
- Developed example Autograder assignment for use as Cloud Assignment 0
Next Steps
- Update Cloud Assignment 1 for new class session. Make sure typos are fixed. Determine publishing format (PDF or HTML).
- Develop ideas for new Cloud Assignment 2.
- Read through “Cloud Computing: Theory and Practice, 3rd edition” by Dan Marinescu for Cloud Assignment ideas.
Analyzing course use of Gradescope’s Autograder
During the spring term of 2025, Patryk Tomalak developed four cloud assignments that utilized a Gradescope feature called “Autograder”. By packaging resources in a zip file, instructors can create a custom grading experience for any assignment. The autograding experience for the cloud assignments were designed as “mastery learning” exercises encouraging students to solve assignments step-by-step as they worked towards a perfect score. The autograder scripts run on each student submission, providing feedback by awarding points or displaying helpful error messages. Students have an unlimited number of submission attempts during the assignment time period, and assignments were self-contained. That is, apart from registering for an Amazon Web Services (AWS) account, every step required to pass an assignment was documented within the assignment PDF itself, and successful completion of an assignment did not rely on the result of previous assignments.
I will take a moment to analyze the approach taken by Patryk in developing these assignments. Assignment tasks revolved around provisioning AWS resources - virtual machines, cloud functions - and using orchestration features, both open-source and proprietary to the AWS platform. The autograder scripts relied on an AWS access key to review a student’s AWS account, the student themselves would create a “CS351-autograder” user with read-only access, to which they associate and store an AWS access key for later submission to Gradescope. The scripts also initiated key-based SSH access to any virtual machine by means of a private key packaged in the grader zip file, for which the corresponding public key was shared with students in each assignment. These access mechanisms allowed instructors to query two sources of information: First, the student’s account with a cloud provider, which contains the data on how they are using the platform, and second, the resources provisioned using the platform, enabling comprehensive auto-verification of an assignment’s requirements.
The grader zip files followed a common directory structure:
grader.zip
├── config
├── id_rsa
├── requirements.txt
├── run_autograder
├── run_tests.py
├── setup.sh
└── tests
└── test_aws.pyconfig: contains a TOML configuration for the grading script’s AWS API client.id_rsa: the private key used for SSH connections to student resources.requirements.txt: python dependency list for the grading script.run_autograder: bash script that runs on each student submission, copies the assignment submission files and runs “run_tests.py”.run_tests.py: Uses unittest to execute all test cases defined in the “tests” directory.setup.sh: shell script that runs on container initialization, installing python system-wide along with the dependencies fromrequirements.txt. Also copies the remaining grader files to the appropriate places.test_aws.py: comprehensive unit tests that take advantage of Gradescope’s Python utilities for the “mastery learning” experience.
Several Python libraries power the unit tests:
gradescope-utils: Assigns question numbers and grading weights to each unit test, which are eventually reflected in Gradescope’s UI.botocoreandboto3: AWS SDK for Python.paramiko: SSH client and server implemented in Python.
A typical unit test will verify the autograder has access to the student’s AWS account, that the “CS351-autograder” user exists, and that an AWS budget was created to detect free-tier overruns, before listing any expected resources, like an EC2 instance, and connecting to or asserting against them. The stdout of the executed unit tests are parsed by another Gradescope utility “JSONTestRunner” and stored in a file “results.json”. The contents determine what the student will see in their assignment submission and their final score.
Creating a cloud assignment
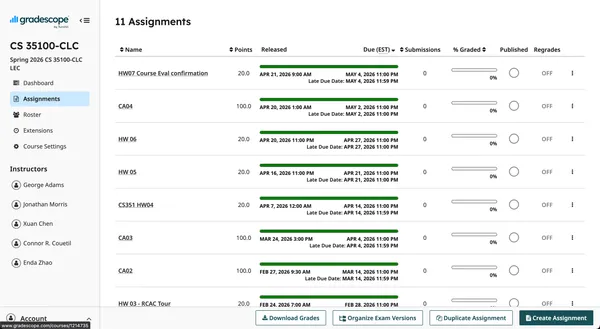
Visit https://www.gradescope.com. Log in and visit course “CS 35100-CLC”.
Click “Assignments” on the left menu.

Click “Create Assignment” at the bottom right.
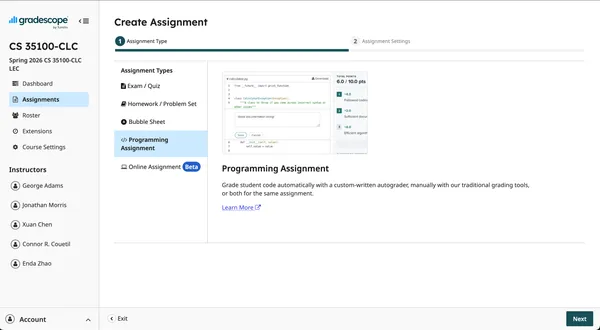
Select the “Programming Assignment” type then click “Next”.
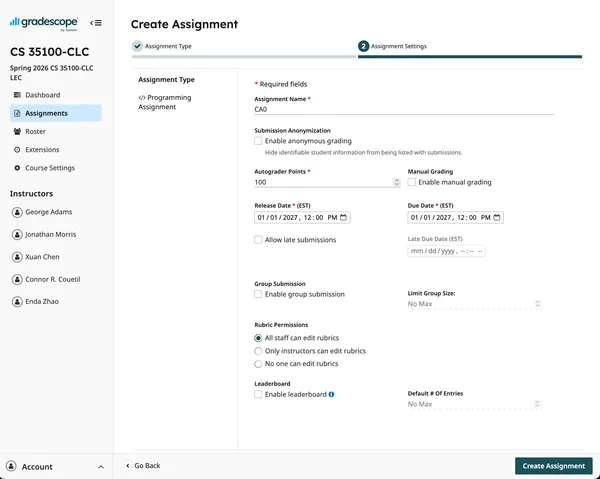
Fill in the displayed fields. You must specify the total points for the assignments, the release date, and the due date. Last session all cloud assignments were worth 100 points. Then click “Create Assignment”.
You have created a new assignment and are now able to upload a zip file containing the autograder files that will run when students submit.
Let’s start designing a simple cloud assignment. Our goal for this assignment is to verify students have correctly configured our autograder’s access to their AWS account, and that they are able to spin up an EC2 instance the autograder can SSH into. This will help instructional staff feel confident all students are prepared for the course assignments.
Remember the directory structure for our autograder setup, and keep the documentation page as reference.
grader.zip
├── config
├── id_rsa # we'll change to id_ed25519
├── requirements.txt
├── run_autograder
├── run_tests.py
├── setup.sh
└── tests
    └── test_aws.py
The config file should contain our AWS SDK settings.
[default]
region = "us-east-1"
output = "json"
Next we’ll generate a new private key, this time a shorter ed25519 key, using
ssh-keygen. Do not set a passphrase. Keep the public key at hand, we’ll
include it in the assignment document.
$ ssh-keygen -o
Generating public/private ed25519 key pair.
Enter file in which to save the key (~/.ssh/id_ed25519): ./id_ed25519
Enter passphrase for "./id_ed25519" (empty for no passphrase):
Enter same passphrase again:
Your identification has been saved in ./id_ed25519
Your public key has been saved in ./id_ed25519.pub
The key fingerprint is:
SHA256:npsK/8qXY9TFTsDJEbxcAxqwsWfNenrfg2dkReiVYbA user@hostname.local
The key's randomart image is:
+--[ED25519 256]--+
|      o..++= ..+o|
|       + =* o +.o|
|      o +.o= E o |
|       o .o + . .|
|        S..+   . |
|       ..+. . o  |
|    .  .+..  +   |
|     +  =+ ...+  |
|      =*+.  .o.. |
+----[SHA256]-----+
Our python script will rely on libraries defined in requirements.txt
gradescope-utils>=0.3.1
botocore
boto3
paramiko
and setup.sh initializes the Ubuntu container created for our
autograder assignment.
#!/usr/bin/env bash
apt-get install -y python3 python3-pip python3-dev

pip3 install -r /autograder/source/requirements.txt

mkdir ~/.aws/
cp /autograder/source/config ~/.aws/config
cp /autograder/source/id_ed25519 $PWD
run_autograder will run on each submission,
#!/usr/bin/env bash

# Copy credentials to the AWS credentials directory
cp /autograder/submission/credentials ~/.aws/credentials

cd /autograder/source

# Run the Python script
python3 run_tests.py
passing control to Python through run_tests.py.
import unittest
from gradescope_utils.autograder_utils.json_test_runner import JSONTestRunner

if __name__ == '__main__':
  suite = unittest.defaultTestLoader.discover('tests')
  with open('/autograder/results/results.json', 'w') as f:
      JSONTestRunner(visibility='visible', stream=f).run(suite)
Everything we have defined so far will remain much the same for each cloud_assignment. It is the simple scaffolding enabling our method of grading assignments.
Now, let’s get to the meat of the autograder setup: the unit tests. This will
vary by assignment, and will represent most of the work of creating cloud
assignments. All our unit test files will be in a directory tests/. For now,
all unit test functions will be in a single file, test_aws.py.
Let’s create a minimal test_aws.py file.
import unittest
import boto3 # AWS SDK
import paramiko # SSH client
from gradescope_utils.autograder_utils.decorators import weight, number

class TestAWS(unittest.TestCase):
  @weight(1)
  @number(1)
  def test_case(self):
      self.fail("TODO")
Finally, we’ll zip everything up.
$ tree .
.
└── grader
   ├── config
   ├── id_ed25519
   ├── id_ed25519.pub
   ├── requirements.txt
   ├── run_autograder
   ├── run_tests.py
   ├── setup.sh
   └── tests
       └── test_aws.py
$ (cd grader; zip -r ../grader.zip *)
adding: config (stored 0%)
adding: id_ed25519 (deflated 33%)
adding: id_ed25519.pub (deflated 4%)
adding: requirements.txt (deflated 4%)
adding: run_autograder (deflated 33%)
adding: run_tests.py (deflated 36%)
adding: setup.sh (deflated 36%)
adding: tests/ (stored 0%)
adding: tests/test_aws.py (deflated 33%)
$ zipinfo grader.zip
Archive:  grader.zip
Zip file size: 2532 bytes, number of entries: 9
-rw-r--r--  3.0 unx       43 tx stor 26-Jan-18 17:59 config
-rw-------  3.0 unx      444 tx defN 26-Jan-18 18:00 id_ed25519
-rw-r--r--  3.0 unx      123 tx defN 26-Jan-18 18:00 id_ed25519.pub
-rw-r--r--  3.0 unx       49 tx defN 26-Jan-18 19:48 requirements.txt
-rw-r--r--  3.0 unx      200 tx defN 26-Jan-18 19:49 run_autograder
-rw-r--r--  3.0 unx      307 tx defN 26-Jan-18 19:49 run_tests.py
-rw-r--r--  3.0 unx      221 tx defN 26-Jan-18 19:49 setup.sh
drwxr-xr-x  3.0 unx        0 bx stor 26-Jan-18 19:56 tests/
-rw-r--r--  3.0 unx      257 tx defN 26-Jan-18 19:56 tests/test_aws.py
9 files, 1644 bytes uncompressed, 1152 bytes compressed:  29.9%
It’s time to upload our autograder definition, and run a test to see if its working.
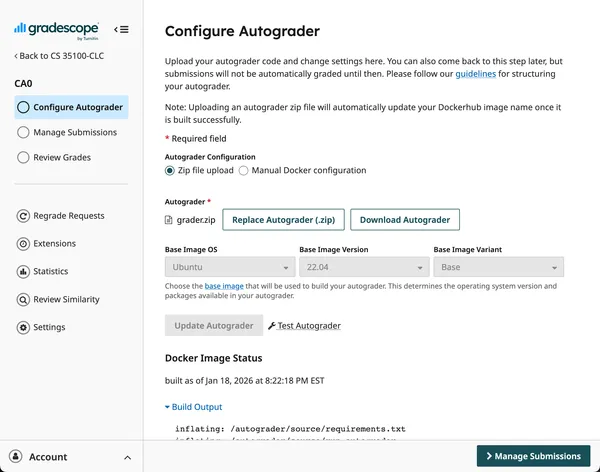
Navigate to the “CA0” assignment we created and click “Select Autograder”. Upload the zip file we just created.
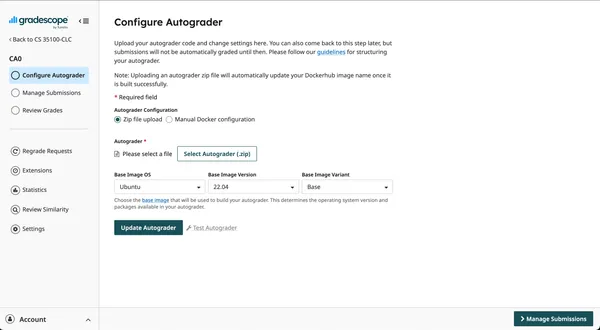
Then click “Update Autograder”. This will start a build of the Docker image, and the build log, along with any errors, will be displayed below the update button for debugging purposes.
Now click “Test Autograder”.
You’ll be asked to upload a submission file. Our current autograder script doesn’t care what you upload, so upload a blank file for now. Students will eventually submit a file containing the AWS access key credentials for the autograder to access their AWS account.
Click “Upload” and wait for the autograder to finish. The result will show a failure, like we expected, and include debugging information from the run.
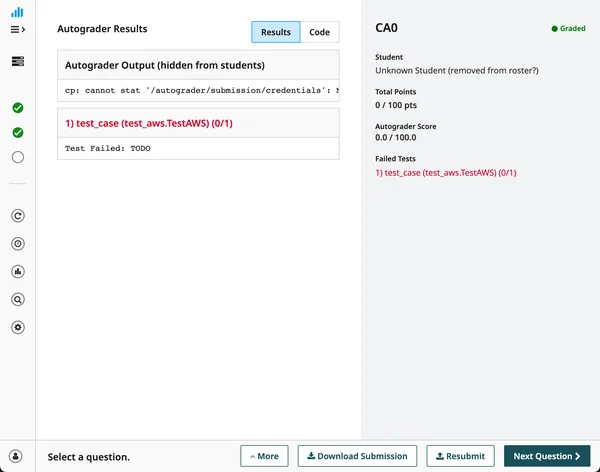
This upload and test flow will be how we test cloud assignments before release.
Let’s take a look at part of the final test_aws.py file for Cloud Assignment 0.
import unittest
import boto3
import paramiko
from gradescope_utils.autograder_utils.decorators import weight, number

class TestAWS(unittest.TestCase):
  _cache = {}

  @property
  def account_id(self):
      """
      Returns the AWS account id for the current AWS user
      """
      if 'identity' not in self._cache:
          self._cache['identity'] = boto3.client('sts').get_caller_identity()
      return self._cache['identity']['Account']

  ...

  @property
  def ec2_instances(self):
      """
      Returns a list of all ec2 instances in the account
      """
      if 'ec2_instances' not in self._cache:
          self._cache['ec2_instances'] = (
              boto3.client('ec2').describe_instances(Filters=[
                  {'Name': 'instance-state-name', 'Values': ['running']}
              ])
          )
      return [
          instance
          for res in self._cache['ec2_instances']['Reservations']
          for instance in res['Instances']
      ]

  ...

  @weight(15)
  @number(1.1)
  def test_aws_account_access(self):
      """
      Autograding - can connect with AWS?
      """
      if not any(char.isalpha() for char in self.account_id):
          print(f'AWS Account ID: {self.account_id}')
      else:
          self.fail('Accessing the account failed, go back to the cloud assignment handout and try following the instructions carefully')

  @weight(15)
  @number(1.2)
  def test_aws_autograder_user(self):
      """
      Autograding - required user 'CS351-autograder' exists?
      """
      if any(user['UserName'] == 'CS351-autograder' for user in self.iam_users):
          print('CS351-autograder detected in users')
      else:
          self.fail('unable to find CS351-autograder in IAM users')

  ...

  @weight(15)
  @number(3.1)
  def test_ec2_instance_exists(self):
      """
      EC2 - Does the correct instance exist?
      """
      num_instances = len(self.ec2_instances)
      if num_instances != 1:
          self.fail(f'Did not find the expected number of EC2 instances running (found {num_instances}, expected 1). Remember, use the us-east-1 region and have exactly one instance running for this lab.')

      instance = self.ec2_instances[0]
      tags = instance.get('Tags', [])
      if not any(tag['Key'] == 'Name' and tag['Value'] == 'ca0' for tag in tags):
          self.fail('EC2 instance must be named ca0')

      if instance['InstanceType'] != 't2.micro':
          self.fail('EC2 instance must be a t2.micro')

      volume_sizes = [volume['Size'] for volume in self.ebs_volumes]
      if not all(size < 30 for size in volume_sizes):
          self.fail('You exceeded the free EBS volume size of 30GB.')

      platform_details = instance.get('PlatformDetails')
      if not platform_details or 'Linux' not in platform_details:
          self.fail(f'Expected EC2 instance to be running Linux. (found "{platform_details}")')

  ...

  @weight(25)
  @number(3.2)
  def test_ec2_accessible_by_ssh(self):
      """
      EC2 - can connect to instance over SSH?
      """
      instance = self.ec2_instances[0]
      public_ip = instance.get('PublicIpAddress')
      if not public_ip:
          self.fail('Unable to find public ip address for EC2 instance')

      keyname = instance.get('KeyName')
      if not keyname:
          self.fail('Unable to find key pair attached to EC2 instance. Make sure to attach your generated secret key when creating the VM')

      pkey = paramiko.Ed25519Key.from_private_key_file('./id_ed25519')
      ssh = paramiko.SSHClient()
      ssh.set_missing_host_key_policy(paramiko.AutoAddPolicy())
      ssh.connect(hostname=public_ip, username='ec2-user', pkey=pkey, timeout=2)
      stdin, stdout, stderr  = ssh.exec_command('uname -a')

      if not stdout.read().decode('utf-8'):
          self.fail('Unable to connect to EC2 instance over SSH.')

      print('Successfully connected to EC2 instance over SSH')
There are two autograder details to note: First, the title in the UI for a particular question is determined by the docstring in the unit test function. Second, all weights for each unit test must add to the total number of points for the assignment.